Step 6 Constants
As you keep working on a project, it is inevitable to make changes in the source code. Use constants to store values that you want to remain the same. Using constants makes your code more transparent, easier to maintain and saves you time.
In this example, the constants can be divided into two groups. This is one that we will use during development and the other is the text that we display to the user . Examples of such texts are the titles of each page, the captions of the buttons, and the header or label for each piece of data, which will also appear on the interface. The latter group is especially worth paying attention to, because in many cases it can be expected, for example, that the completed application can appear to the user not only in one but also in several languages. The JBStrap framework also provides a simple solution for this, which we will use in the example.
Create a simple text
Application constants
This is the first group of constants mentioned above. In the present example, we will only record the IDs of the three pages we have created here, thus making our own business easier and avoiding typing or forgetting which card we gave which ID.
Implementation is extremely simple: We create a class into which we collect the constants used, in this case the ID of the sheets, as public string variables.
The ApplicationConstants.java source file already exists in the project that was generated from the archetype. Be sure to add the following lines:
- public static final String ORDERS_PAGE = "orders";
- public static final String NEW_ORDER_PAGE = "newOrder";
- public static final String SEARCH_PRODUCT = "searchProduct";
After adding these lines, the ApplicationConstants source file should contain the following:
Text constants
This group contains all the texts that are displayed on the interface: button labels, page headers, data labels, column names, etc. This example is not implemented in multiple languages, but the possibility is still there. Also, this guide tells you about how to do it.
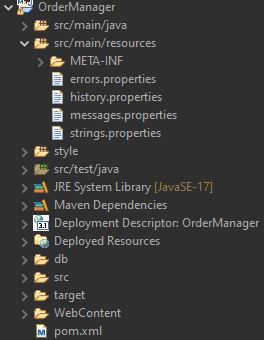
Create a simple text file in the project’s resource folder and name it strings.properties .

This file lists all the strings to be used, identified by unique names. This should look like the following:
That file is created as strings.properties and contains default texts. If you want the application to be in another language (for example, German), all we have to do create a copy of this file as strings_de.properties and translate the texts into German. If you do this, the application is automatically displayed with German texts, provided that the user’s browser language setting is German. Use the # character to place notes in the file. In this project, notes are used to group the individual values. Note that the file also contains a Datasource titles part. This part contains labels/column headers associated with the data sources. Of course, if you don't want to implement it this way, you still can specify tags in the data source by using the title tag. Yet, it's better to do it this way, as this makes it easy to keep tags in one place, and this solution also supports multilingual implementation.
The texts mentioned here are easy to reference in the source code by using the MessageSourceAPI.